Creating Relational Database Service
Overview
Amazon Relational Database Service (RDS) is a managed relational database service provided by Amazon Web Services (AWS). It allows users to easily deploy, manage, and scale relational databases in the cloud computing environment. A DB subnet group is a collection of subnets that an Amazon RDS database instance can be launched into. When creating a DB instance, you need to associate it with an existing DB subnet group
In this section, we will set up the Relational Database Service (RDS) on AWS.
Steps
Create RDS Subnet Group
In this part, we create an RDS Subnet Group.
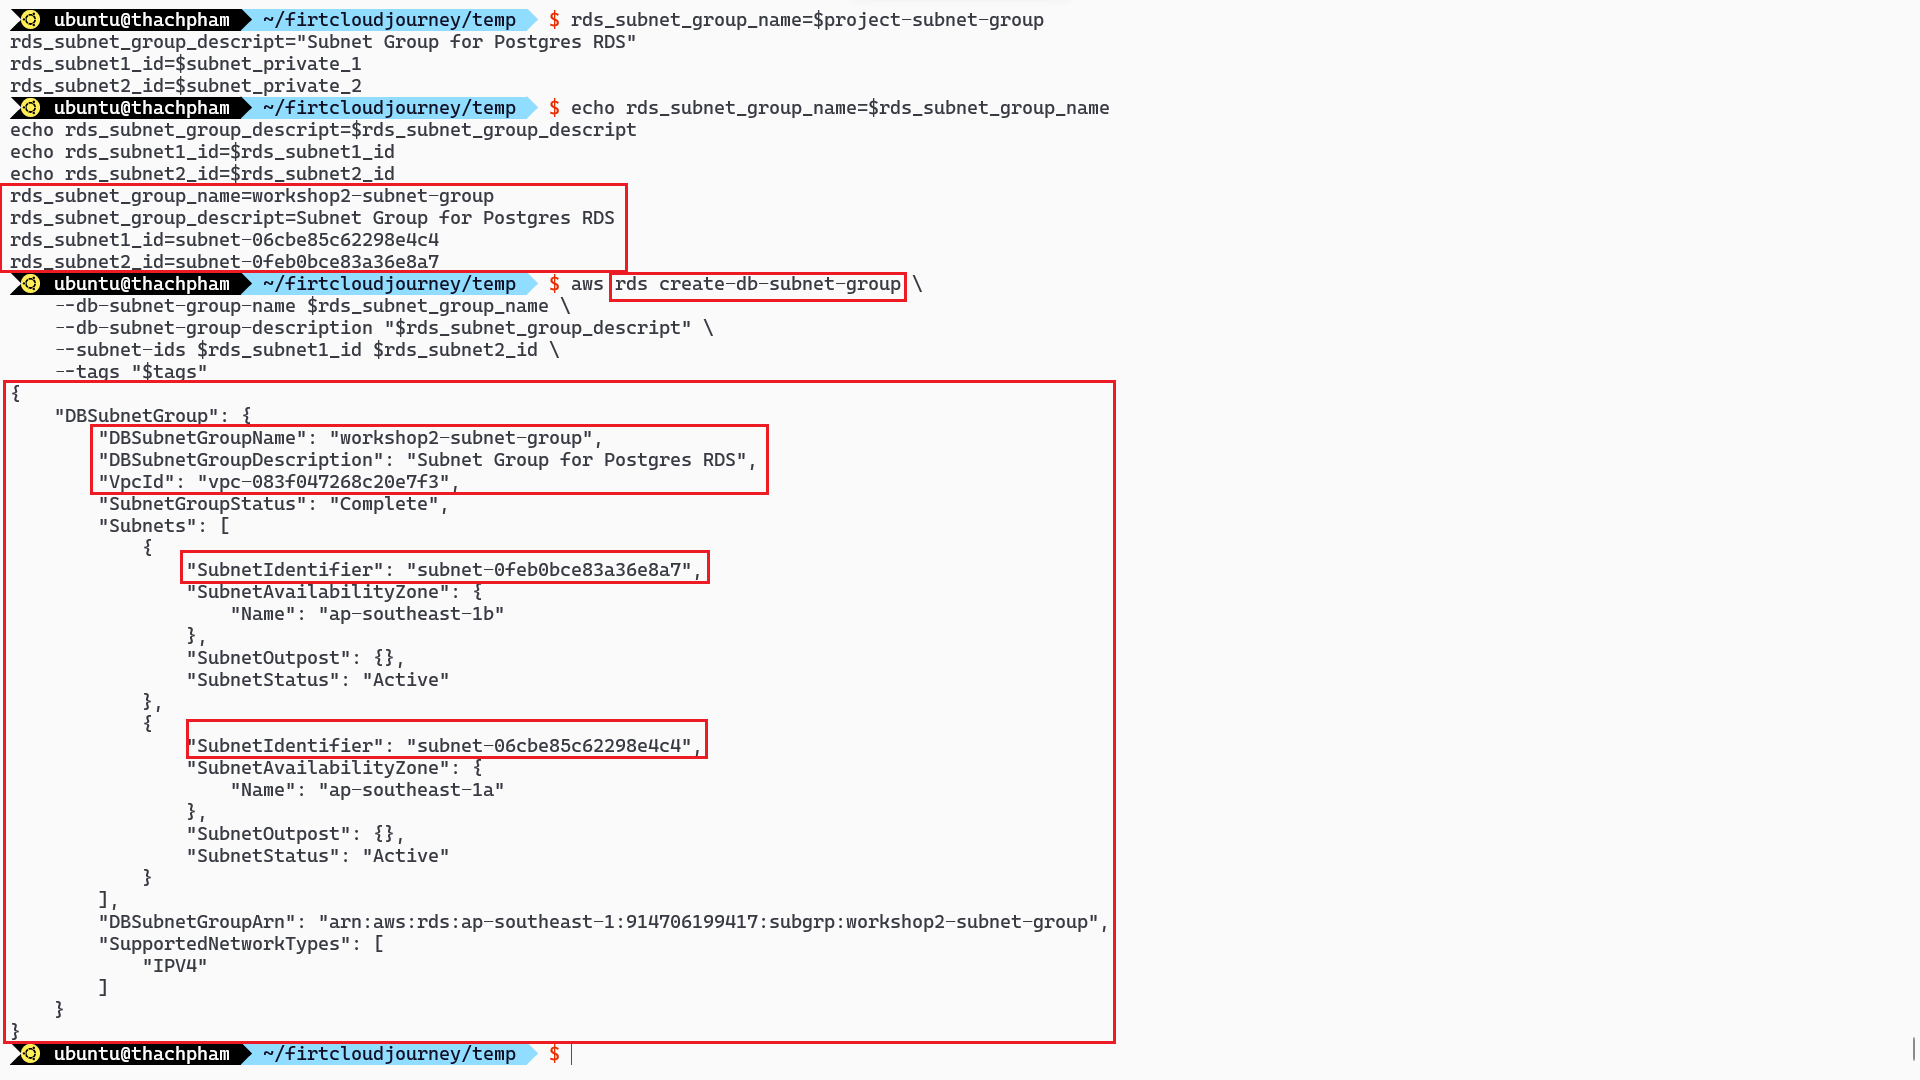
rds_subnet_group_name=$project-subnet-group
rds_subnet_group_descript="Subnet Group for Postgres RDS"
rds_subnet1_id=$subnet_private_1
rds_subnet2_id=$subnet_private_2
# Create Subnet group
aws rds create-db-subnet-group \
    --db-subnet-group-name $rds_subnet_group_name \
    --db-subnet-group-description "$rds_subnet_group_descript" \
    --subnet-ids $rds_subnet1_id $rds_subnet2_id \
    --tags "$tags"
In the above code:
rds_subnet_group_name: This is the name of the RDS Subnet Group, based on the$projectvariable.aws rds create-db-subnet-group: This line creates an RDS Subnet Group with the specified name and description, and associates it with the private subnets.
RDS subnet group requires a minimum of 2 subnets.Deploy RDS
In this part, we deploy the Relational Database Service (RDS) using the previously created RDS Subnet Group.
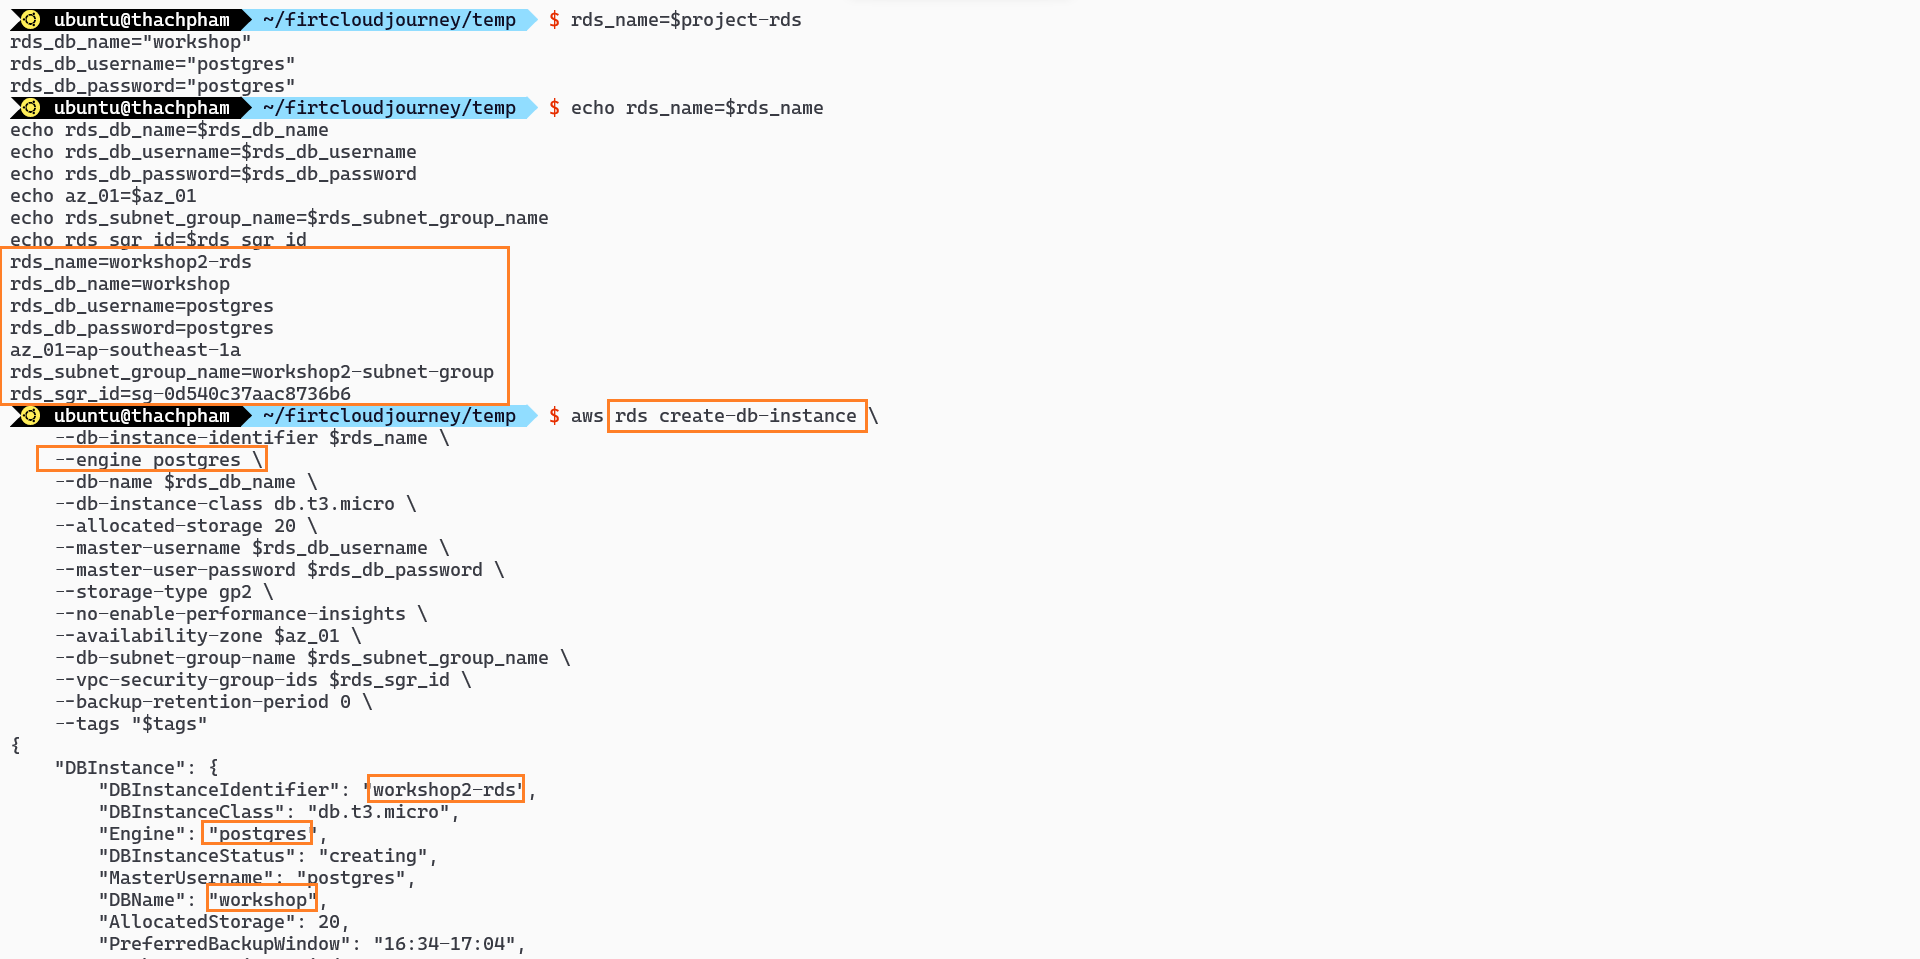
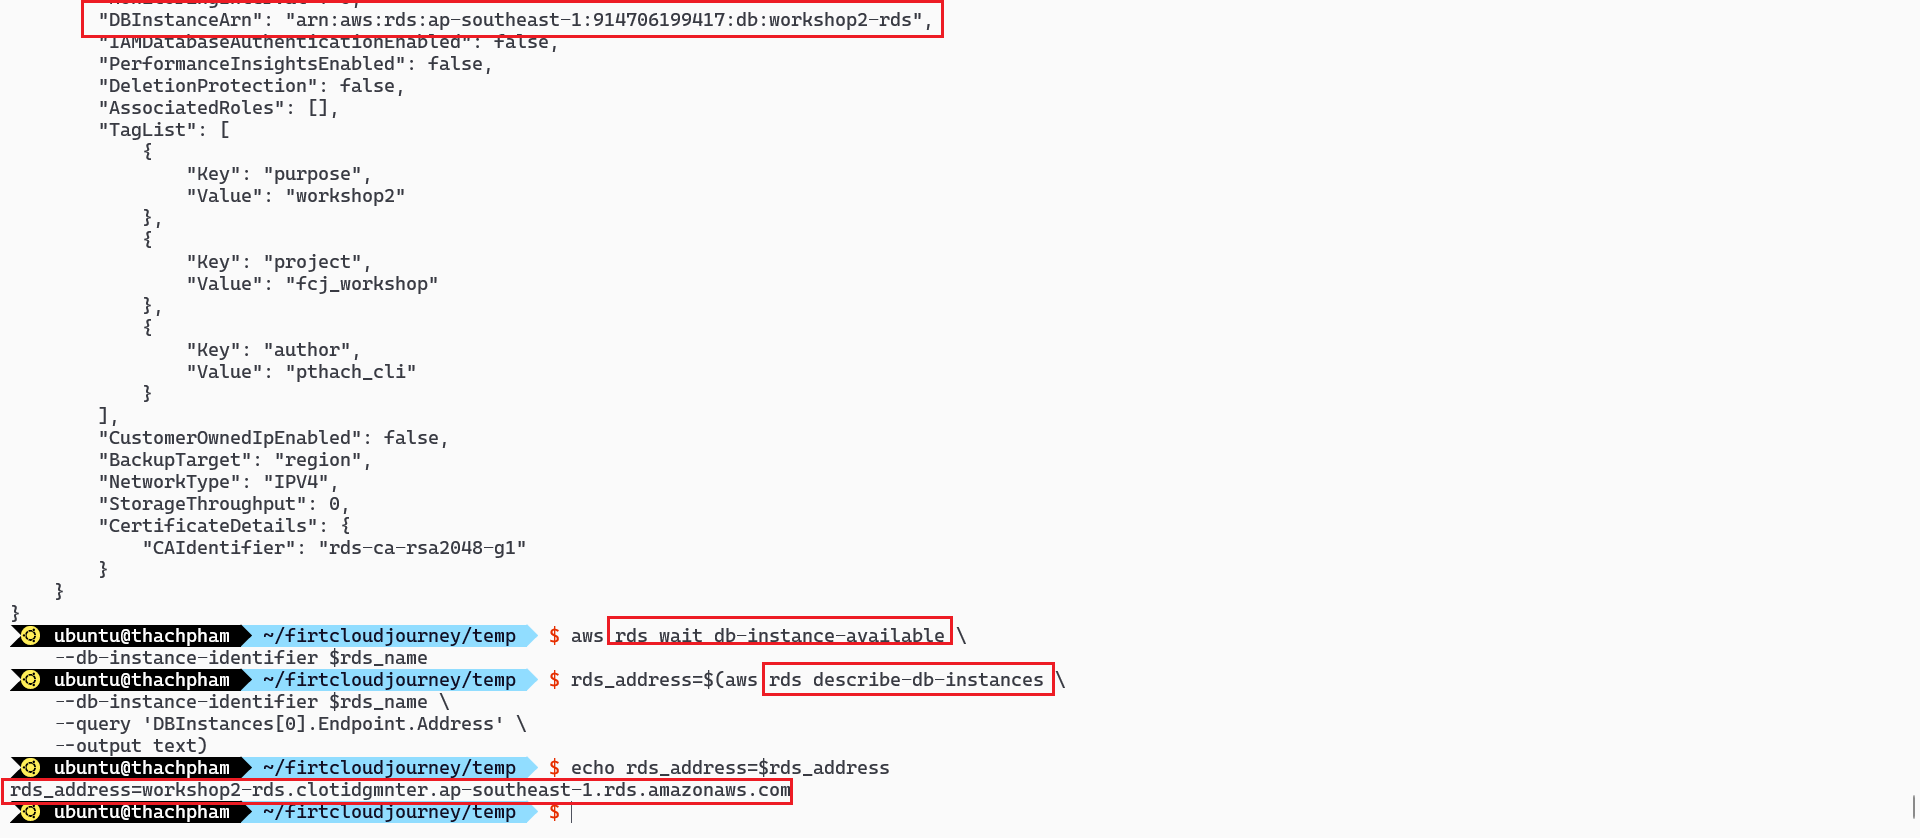
rds_name=$project-rds
rds_db_name="workshop"
rds_db_username="postgres"
rds_db_password="postgres"
# Create RDS
aws rds create-db-instance \
    --db-instance-identifier $rds_name \
    --engine postgres \
    --db-name $rds_db_name \
    --db-instance-class db.t3.micro \
    --allocated-storage 20 \
    --master-username $rds_db_username \
    --master-user-password $rds_db_password \
    --storage-type gp2 \
    --no-enable-performance-insights \
    --availability-zone $az_01 \
    --db-subnet-group-name $rds_subnet_group_name \
    --vpc-security-group-ids $rds_sgr_id \
    --backup-retention-period 0 \
    --tags "$tags"

aws rds wait db-instance-available \
    --db-instance-identifier $rds_name

# Get RDS information
rds_address=$(aws rds describe-db-instances \
    --db-instance-identifier $rds_name \
    --query 'DBInstances[0].Endpoint.Address' \
    --output text)
echo rds_address=$rds_address
In the above code:
rds_instance_name: This is the name of the RDS instance, based on the$projectvariable.aws rds create-db-instance: This line deploys an RDS instance with specific configurations, including instance class, engine type, storage size, subnet group, security group, master username, and password.aws rds describe-db-instancesto get detailed information about an RDS instance based on its identifier (db-instance-identifier) and use--query 'DBInstances[0].Endpoint.Address'to find out the address of the DB instance from the JSON returned by the command.
Execution
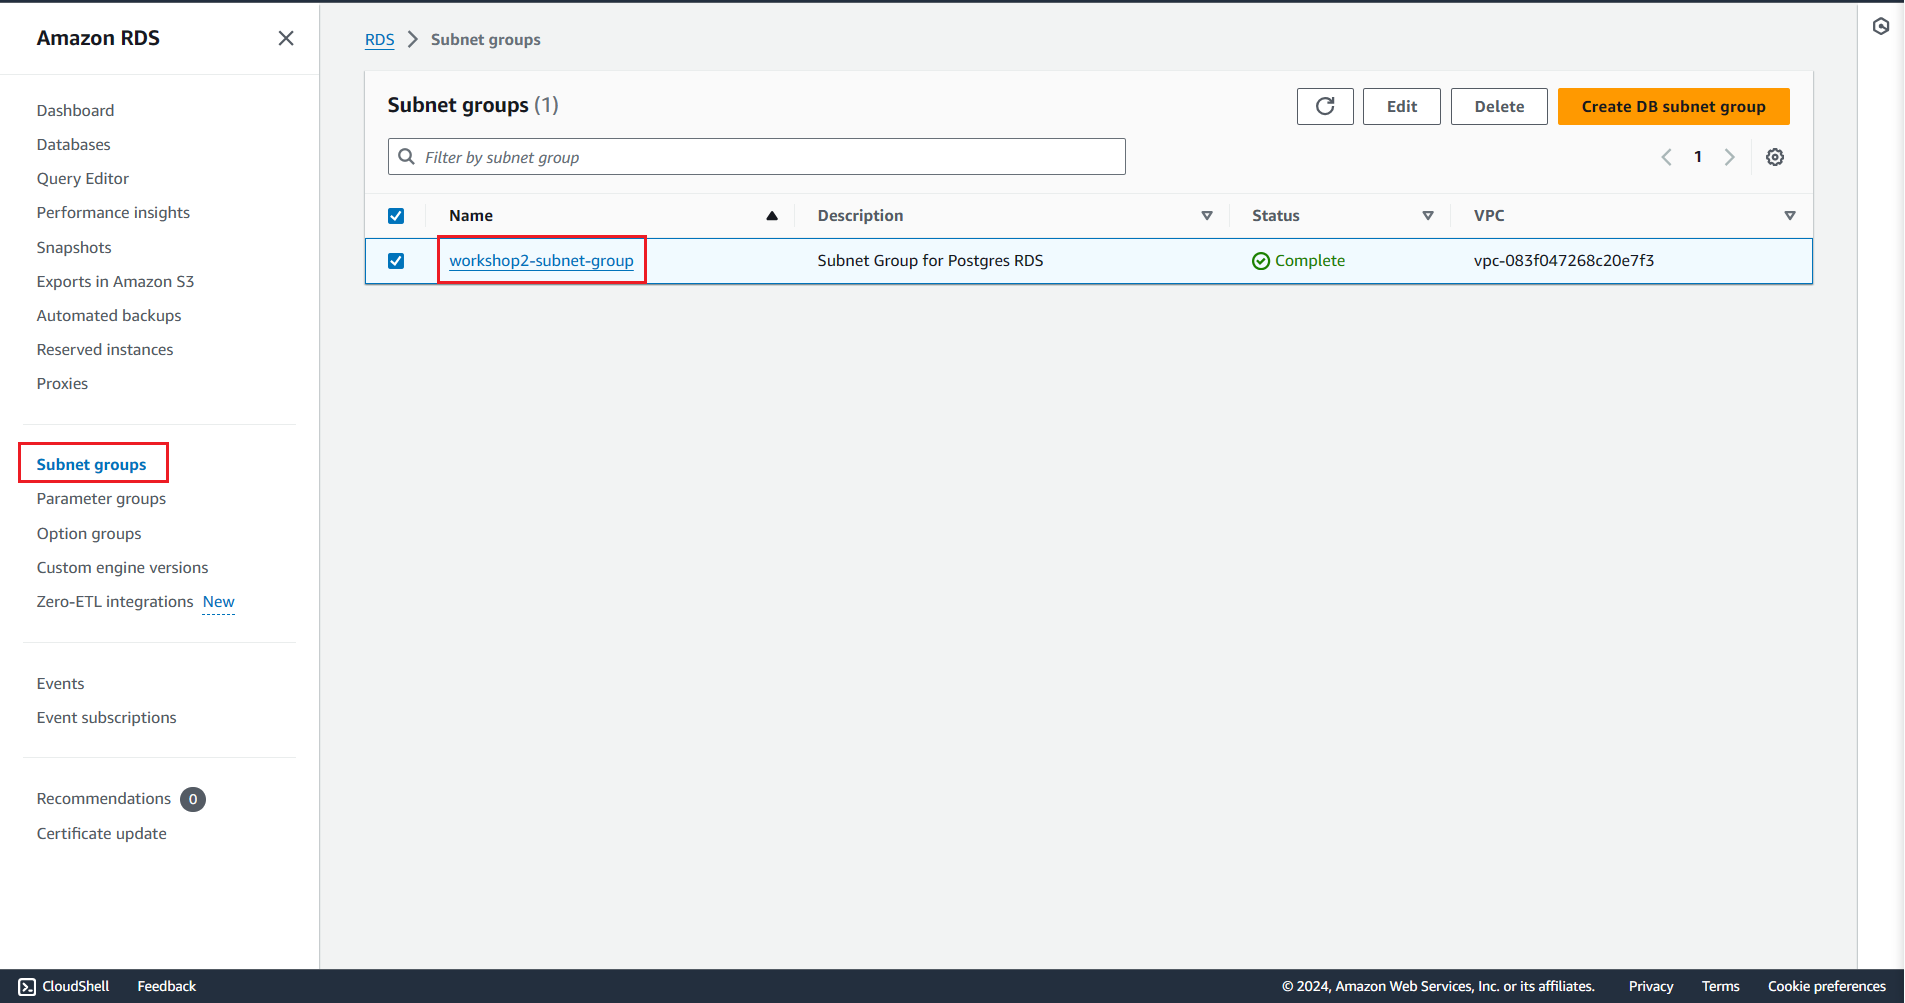
Create RDS Subnet Group
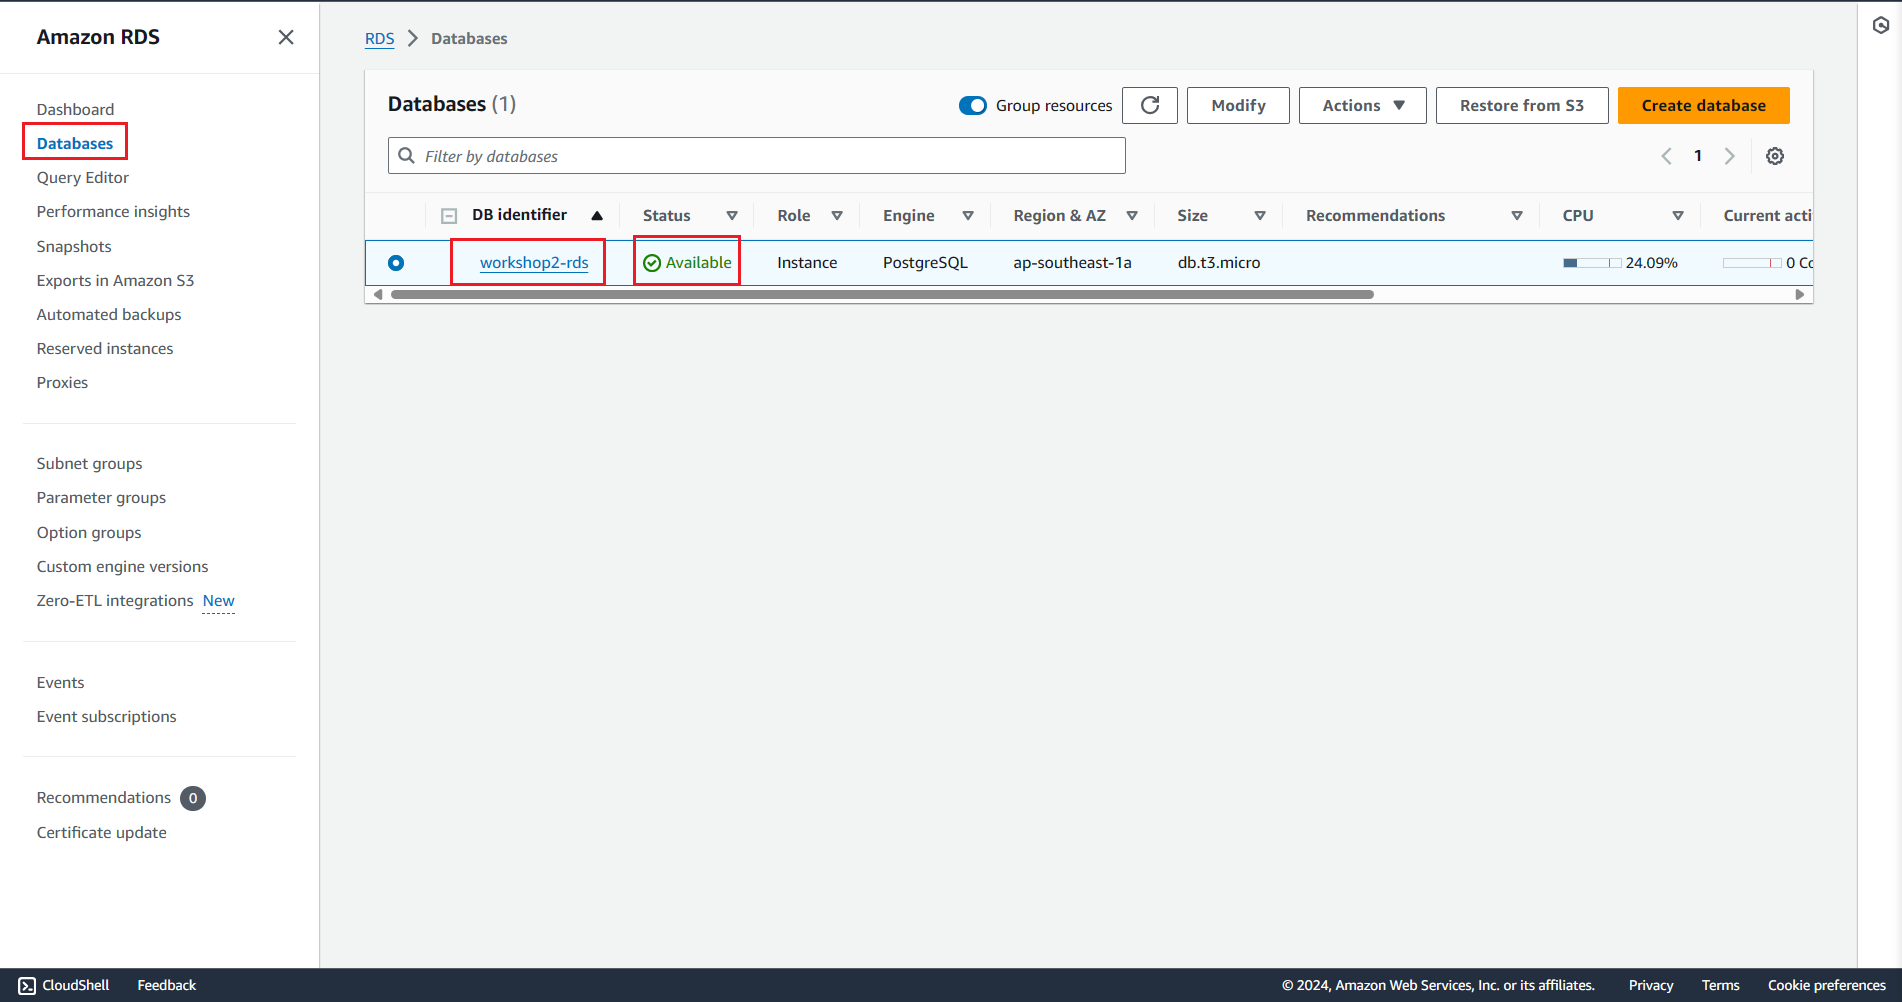
Check on the AWS console
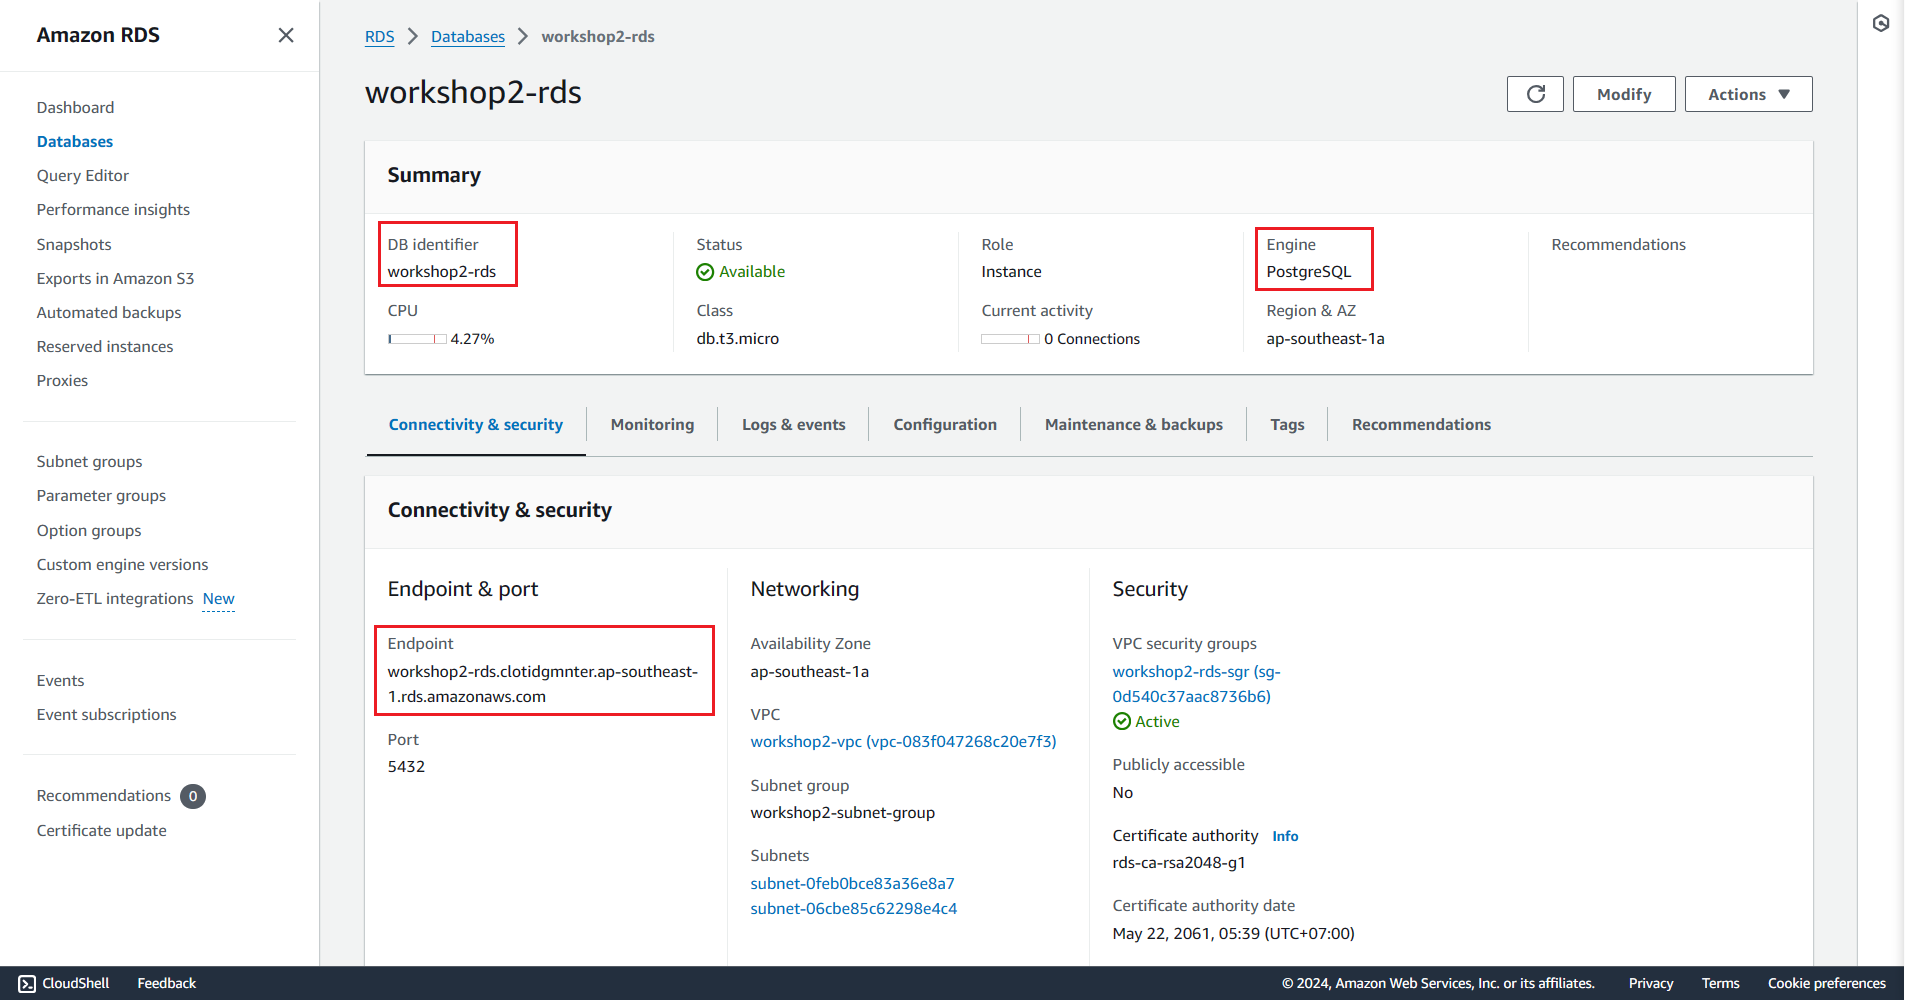
Deploy RDS
Query the address of the RDS Instance
Check the result on the AWS Console