Create S3 Website Module
Overview
In this step, we will create an S3 bucket and configure it to function as a static website hosting.
This step corresponds to Step 3: INSTALL S3 STATIC WEB.
Preparation
Resource
random_integerAs mentioned in the S3 bucket creation section, bucket names must be unique Therefore, we append a random number sequence to the bucket name. Terraform provides the
random_integerresource to generate random number sequences.This resource requires two required arguments:
minandmax. In this case, we need a three-digit number, so we declare it as follows:resource "random_integer" "s3-suffix" { min = 100 max = 999 }To learn more about this resource, visit random_integer (Resource).
Terraform provides many resources to generate other random sequences, characters, IDs, etc., through the Random Provider.Policy File
Declare a policy file (this file will be used in the 4. Bucket policy section under Execution), this section uses one input value,
bucket_name- it will receive a value through thetemplatefilefunction, and this policy will be stored in a file with the format*.tpl.{ "Version": "2012-10-17", "Statement": [ { "Sid": "Statement1", "Principal": "*", "Effect": "Allow", "Action": [ "s3:GetObject" ], "Resource": [ "arn:aws:s3:::${bucket_name}/*" ] } ] }
Execution
Instead of just one step and providing multiple pieces of information like on the AWS Console interface, we have to use multiple different resources to create an S3 bucket like this using Terraform.
Create S3 Bucket
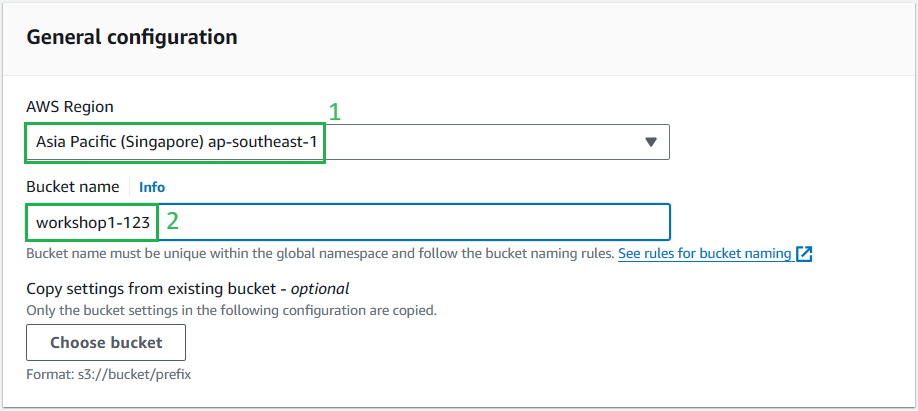
Similar to the General configuration step in section 3. of Pratice in Install S3 Static Web.
resource "aws_s3_bucket" "s3_bucket" {
    bucket = "${var.project-name}-${random_integer.s3-suffix.result}"
    force_destroy = true
    tags   = var.project-tags
}
As mentioned earlier, the S3 Bucket name will be in the format project name-a random number sequence. To get a random number sequence from the
random_integerresource created earlier, we use theresultattribute.Argument
force_destroy: As with Delete S3 in Cleaning up Resources, to delete an S3 bucket, you must first empty it. Similarly, an S3 bucket created with Terraform won’t be deleted when runningterraform destroybecause it still contains data, and using theforce_destroyargument helps delete the S3 bucket without error if it still contains data. However, when using this argument, consider it carefully because the feature prevents deleting the S3 bucket by default to ensure you don’t carelessly delete your data.Object Ownership
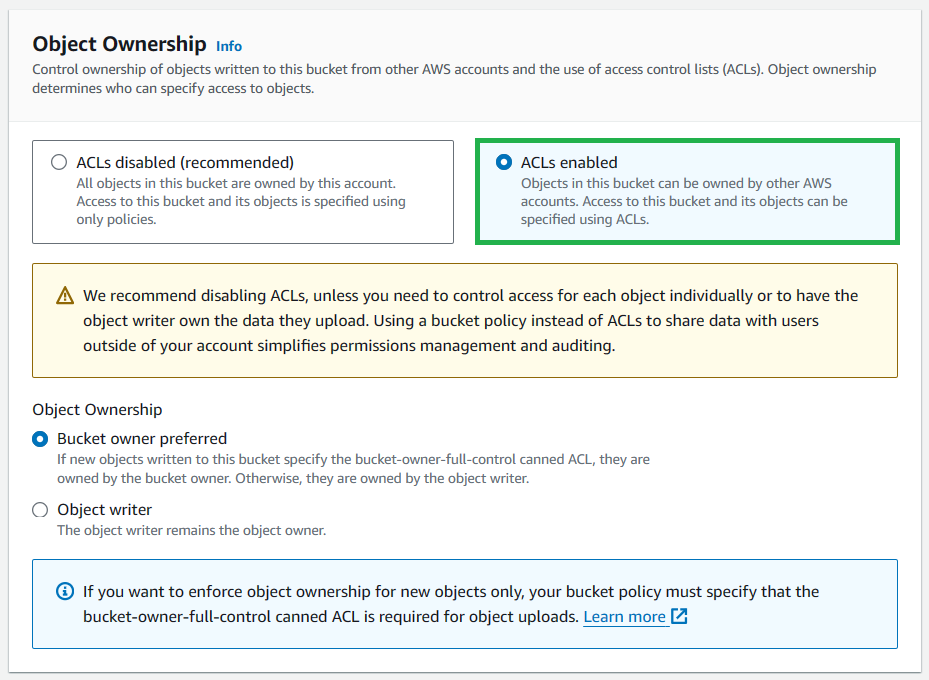
Similar to Object Ownership in step 3. of Pratice in Install S3 Static Web.
resource "aws_s3_bucket_ownership_controls" "bucket_owner" {
    bucket = aws_s3_bucket.s3_bucket.id
    rule {
        object_ownership = "BucketOwnerPreferred"
    }
}
There’s nothing new in this section except for declaring the value for the
bucketargument using theidattribute of the previously created S3 bucket.Block Public Access
Similar to Block Public Access settings for this bucket in step 3. of Pratice in Install S3 Static Web.

resource "aws_s3_bucket_public_access_block" "bucket_public_access_block" {
    bucket = aws_s3_bucket.s3_bucket.id

    block_public_acls       = false
    block_public_policy     = false
    ignore_public_acls      = false
    restrict_public_buckets = false
}
Bucket Policy
This section is related to steps 8 to 11 in Pratice in Install S3 Static Web.
To configure a policy for the S3 bucket, we use the
aws_s3_bucket_policyresource.In this section, we use an argument called
policy. We use the information stored in thes3_policy.json.tplfile using thetemplatefilefunction and pass the value for thebucket_namevariable as follows.Additionally, this section uses a meta-argument
depends_onto ensure that the necessary resources are created before reaching this resource (missing this line will result in an error 😁).resource "aws_s3_bucket_policy" "bucket_policy" { bucket = aws_s3_bucket.s3_bucket.id policy = templatefile("${path.root}/${path.module}/s3_policy.json.tpl", { bucket_name = "${aws_s3_bucket.s3_bucket.bucket}" }) depends_on = [ aws_s3_bucket.s3_bucket, aws_s3_bucket_ownership_controls.bucket_owner] }Static Website Hosting
This section is related to steps 4 to 7 in Pratice in Install S3 Static Web.
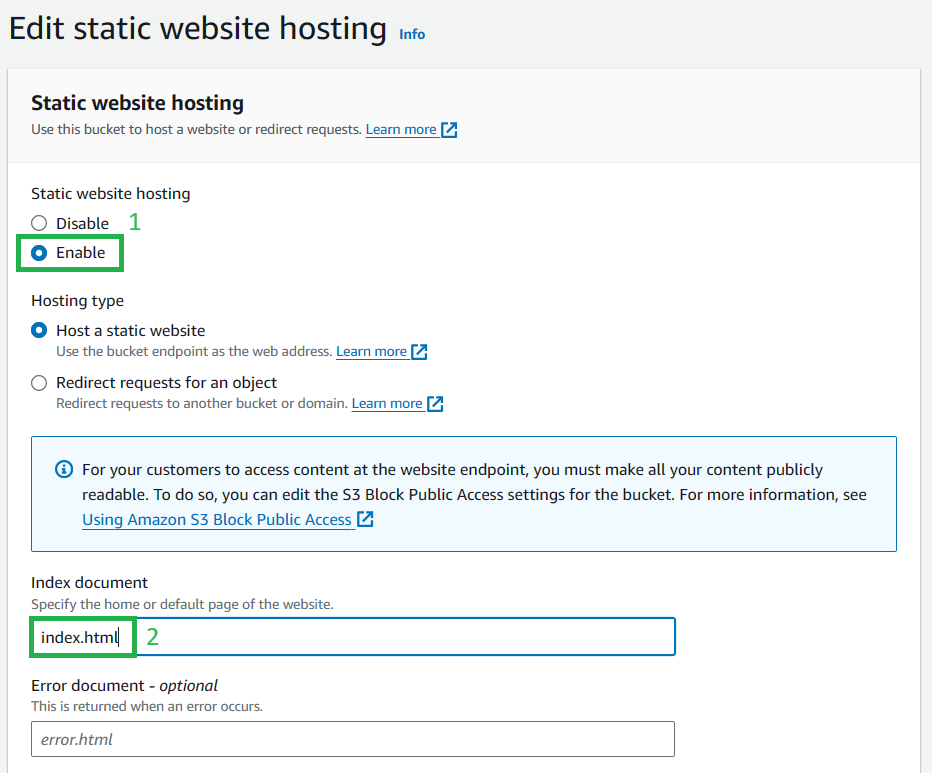
To enable the Static Website Hosting feature of the S3 Bucket, we use the
aws_s3_bucket_website_configurationresource through the following configuration:resource "aws_s3_bucket_website_configuration" "bucket_static_web_host" { bucket = aws_s3_bucket.s3_bucket.id index_document { suffix = "index.html" } }To get bucket website endpoint value, Terraform provides an attribute for this resource called
website_endpoint, and we can retrieve this value through an output block:output "webdomain" { value = aws_s3_bucket_website_configuration.bucket_static_web_host.website_endpoint }